Matt
MattAs the Team of the Year festivities build, and we all look to upgrade our teams and dive into gameplay amongst a sea of packs, let’s take a look at Free-Kicks, and how you can be the next Juninho in and around the box.
Here’s our take on free-kicks in and around the area, and how you can look to execute them with ease in FIFA 23 Ultimate Team.
Subscribe to FUTBIN on YouTube
Here’s our take on free-kicks in and around the area, and how you can look to execute them with ease in FIFA 23 Ultimate Team.
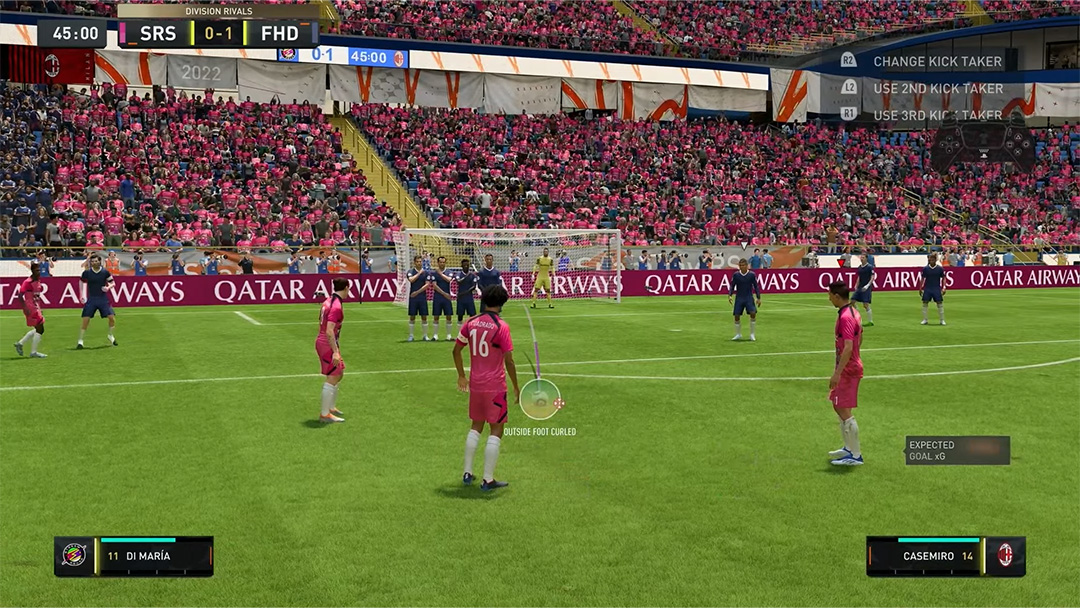
Step 1 - Getting a Free-Kick
Ironically, this is possibly the hardest step, actually obtaining a free-kick in the ideal location to perform this technique.
The optimal distance to perform this technique is in the area shown below, ~25 yards from the goal in the centre of the pitch, prime goalscoring territory.
If you’re looking to earn more free-kicks in and around the box, utilising tricky attackers with 5* Skills is a great tactic, catching out lunging defenders with ball roll scoop turns, elasticos and more.

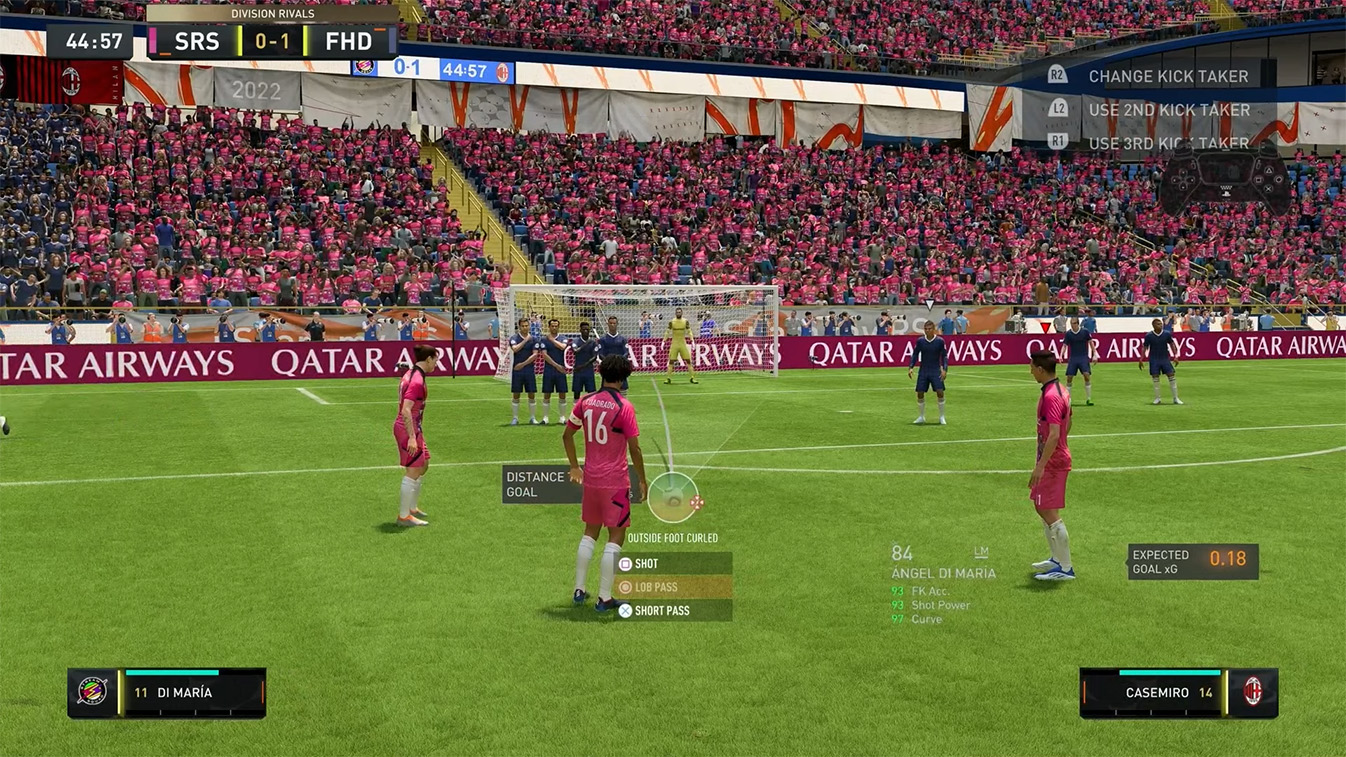
Step 2 - Setting up the Free-Kick
The hard part has been done, a free-kick has been received, you’ve screamed at the pixels on your screen that is the referee, you’ve exclaimed “He could’ve been killed” in your best Sir Alex Ferguson voice, but now it’s time to get down to business, converting the chance.
Let’s go through the routine.
First of all, you need to ensure that you’re utilising a free-kick taker that will strike the ball with the outside of his foot. In the below example, we’re shooting from the left side of the goal, hence we shall utilise a left-footed player - Di Maria is the player of choice (out of shot). If you’re on the right-hand side of the goal, ensure you use a right-footed player to take the free-kick.
In essence, release your inner Roberto Carlos.
Step 3 - Set the Curve
Next up, setting the curve is one of the most important parts of this free-kick method.
For the example below, we set the curve to “Outside Foot Curled” as close as possible to “Outside Foot Low,” positioning the curve as far to the left as it can go.
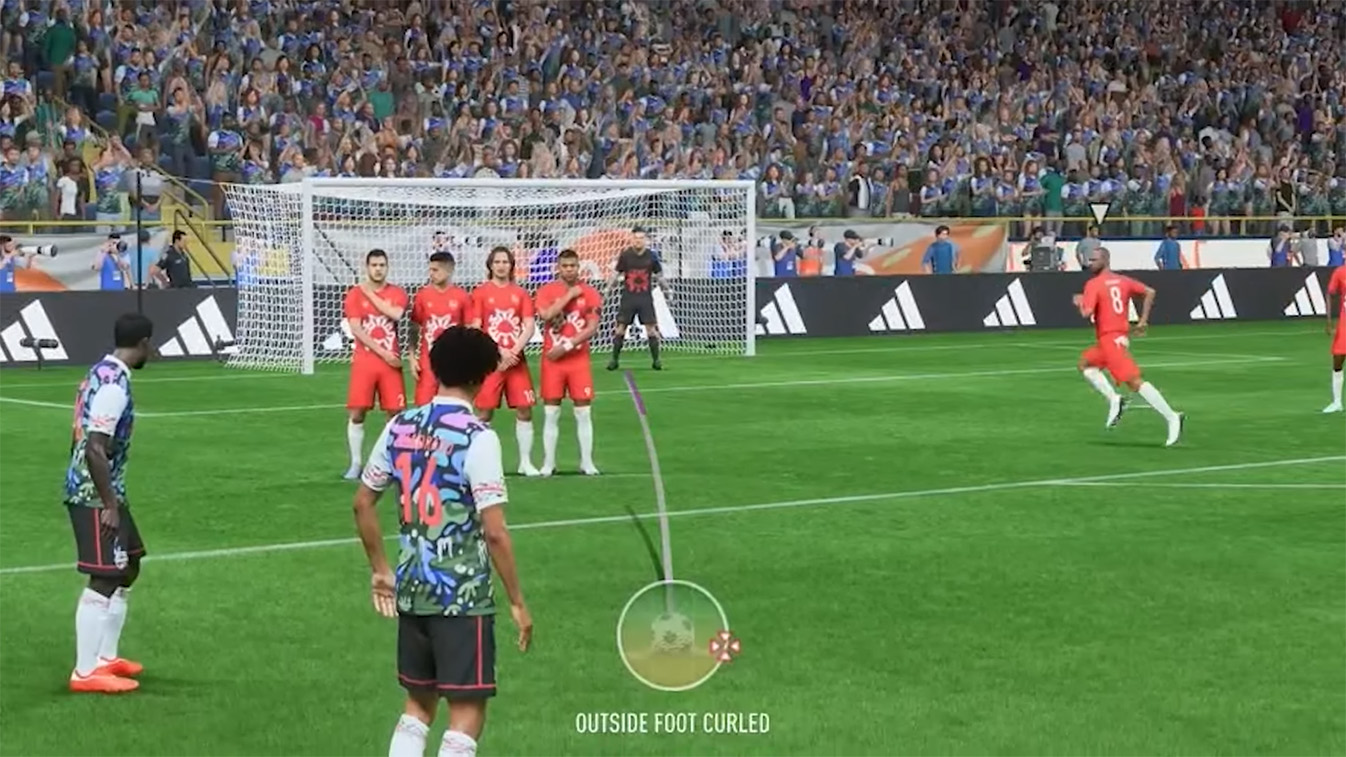
Step 4 - Aiming the Free-Kick
Aiming the free-kick is essential, naturally, unless you want to replicate a CR7 knuckleball gone horribly wrong.
To execute effectively, you want to aim slightly beside the player on the end of the wall closest to the centre of goal.
Aiming around the waistline will ensure that your free kicks don’t go flying into Row Z at the speed of sound putting a virtual fan in hospital, so use that as a rough aiming point, leaving enough of a gap - we recommend around the width of the football.
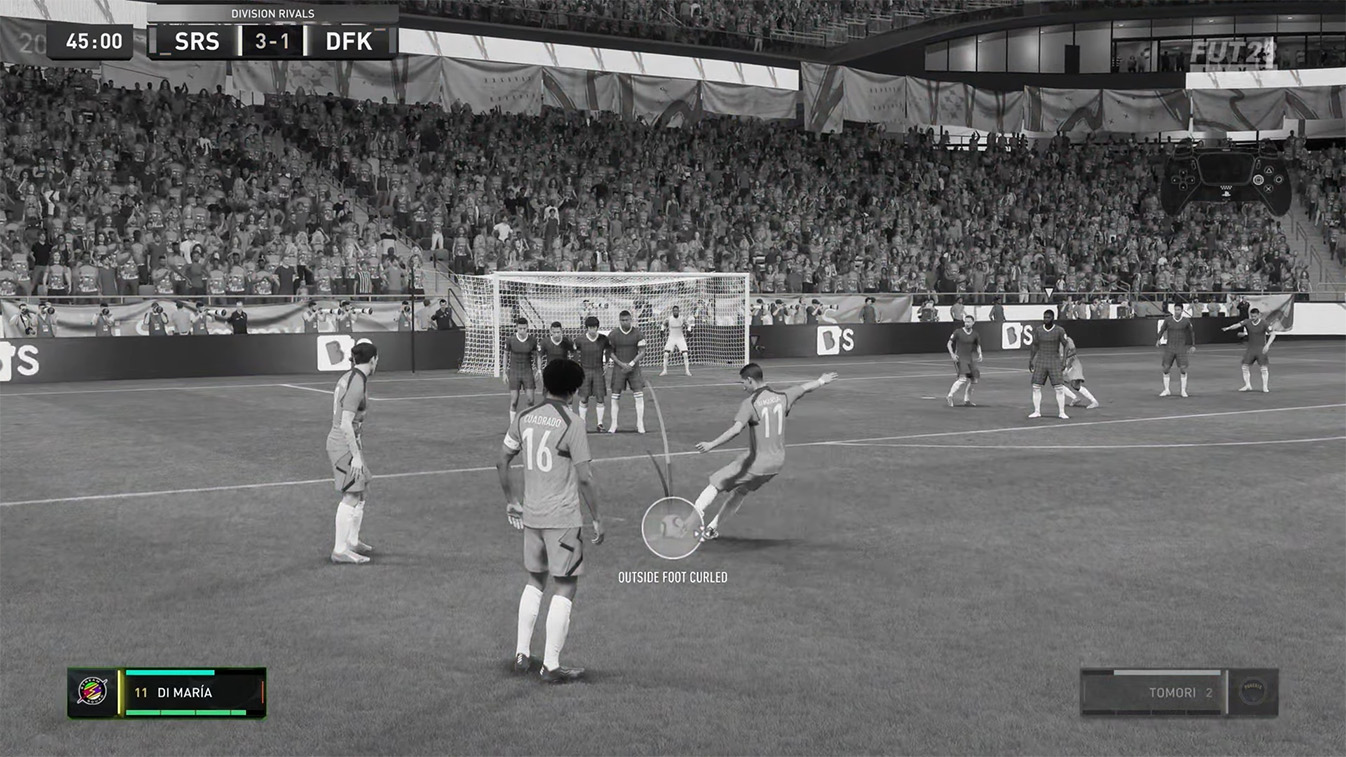
Step 5 - Power-Up!
The time has come. You’ve won the free-kick. You’ve set up what looks like an elaborate training ground routine right from the playbook. You’ve calculated the precise geometry of the shot, it’s now time to pull it off.
When it comes to powering up the shot, don’t hold back!
You’re aiming to use between 3-4 bars of power here, 3 and a half bars being the absolute sweet spot, and of course, for the best results, green-timing your shot as you strike the ball will lead to the most powerful, and accurate results.
Be sure to share your best free-kicks with FUTBIN on Social Media, and be sure to follow for more tutorials & content!