Squad Battles
 English
  français / French
  Español / Spanish
  中文 / Chinese
  العربية / Arabic
  Deutsch / German
  Dansk / Danish
  Dutch / Nederlands
  Italiano / Italian
  עברית / Hebrew
  Português / Portuguese
  Россия / Russian
  Česká / Czech
  日本語 / Japanese
  Türkçe / Turkish
  Norge / Norwegian
  POLSKA / Polish
  Sverige / Swedish


 TOTS Live
  Fantasy
  RTTF
RTTF  Thunderstruck
  FC Pro live
  RTTK
RTTK 


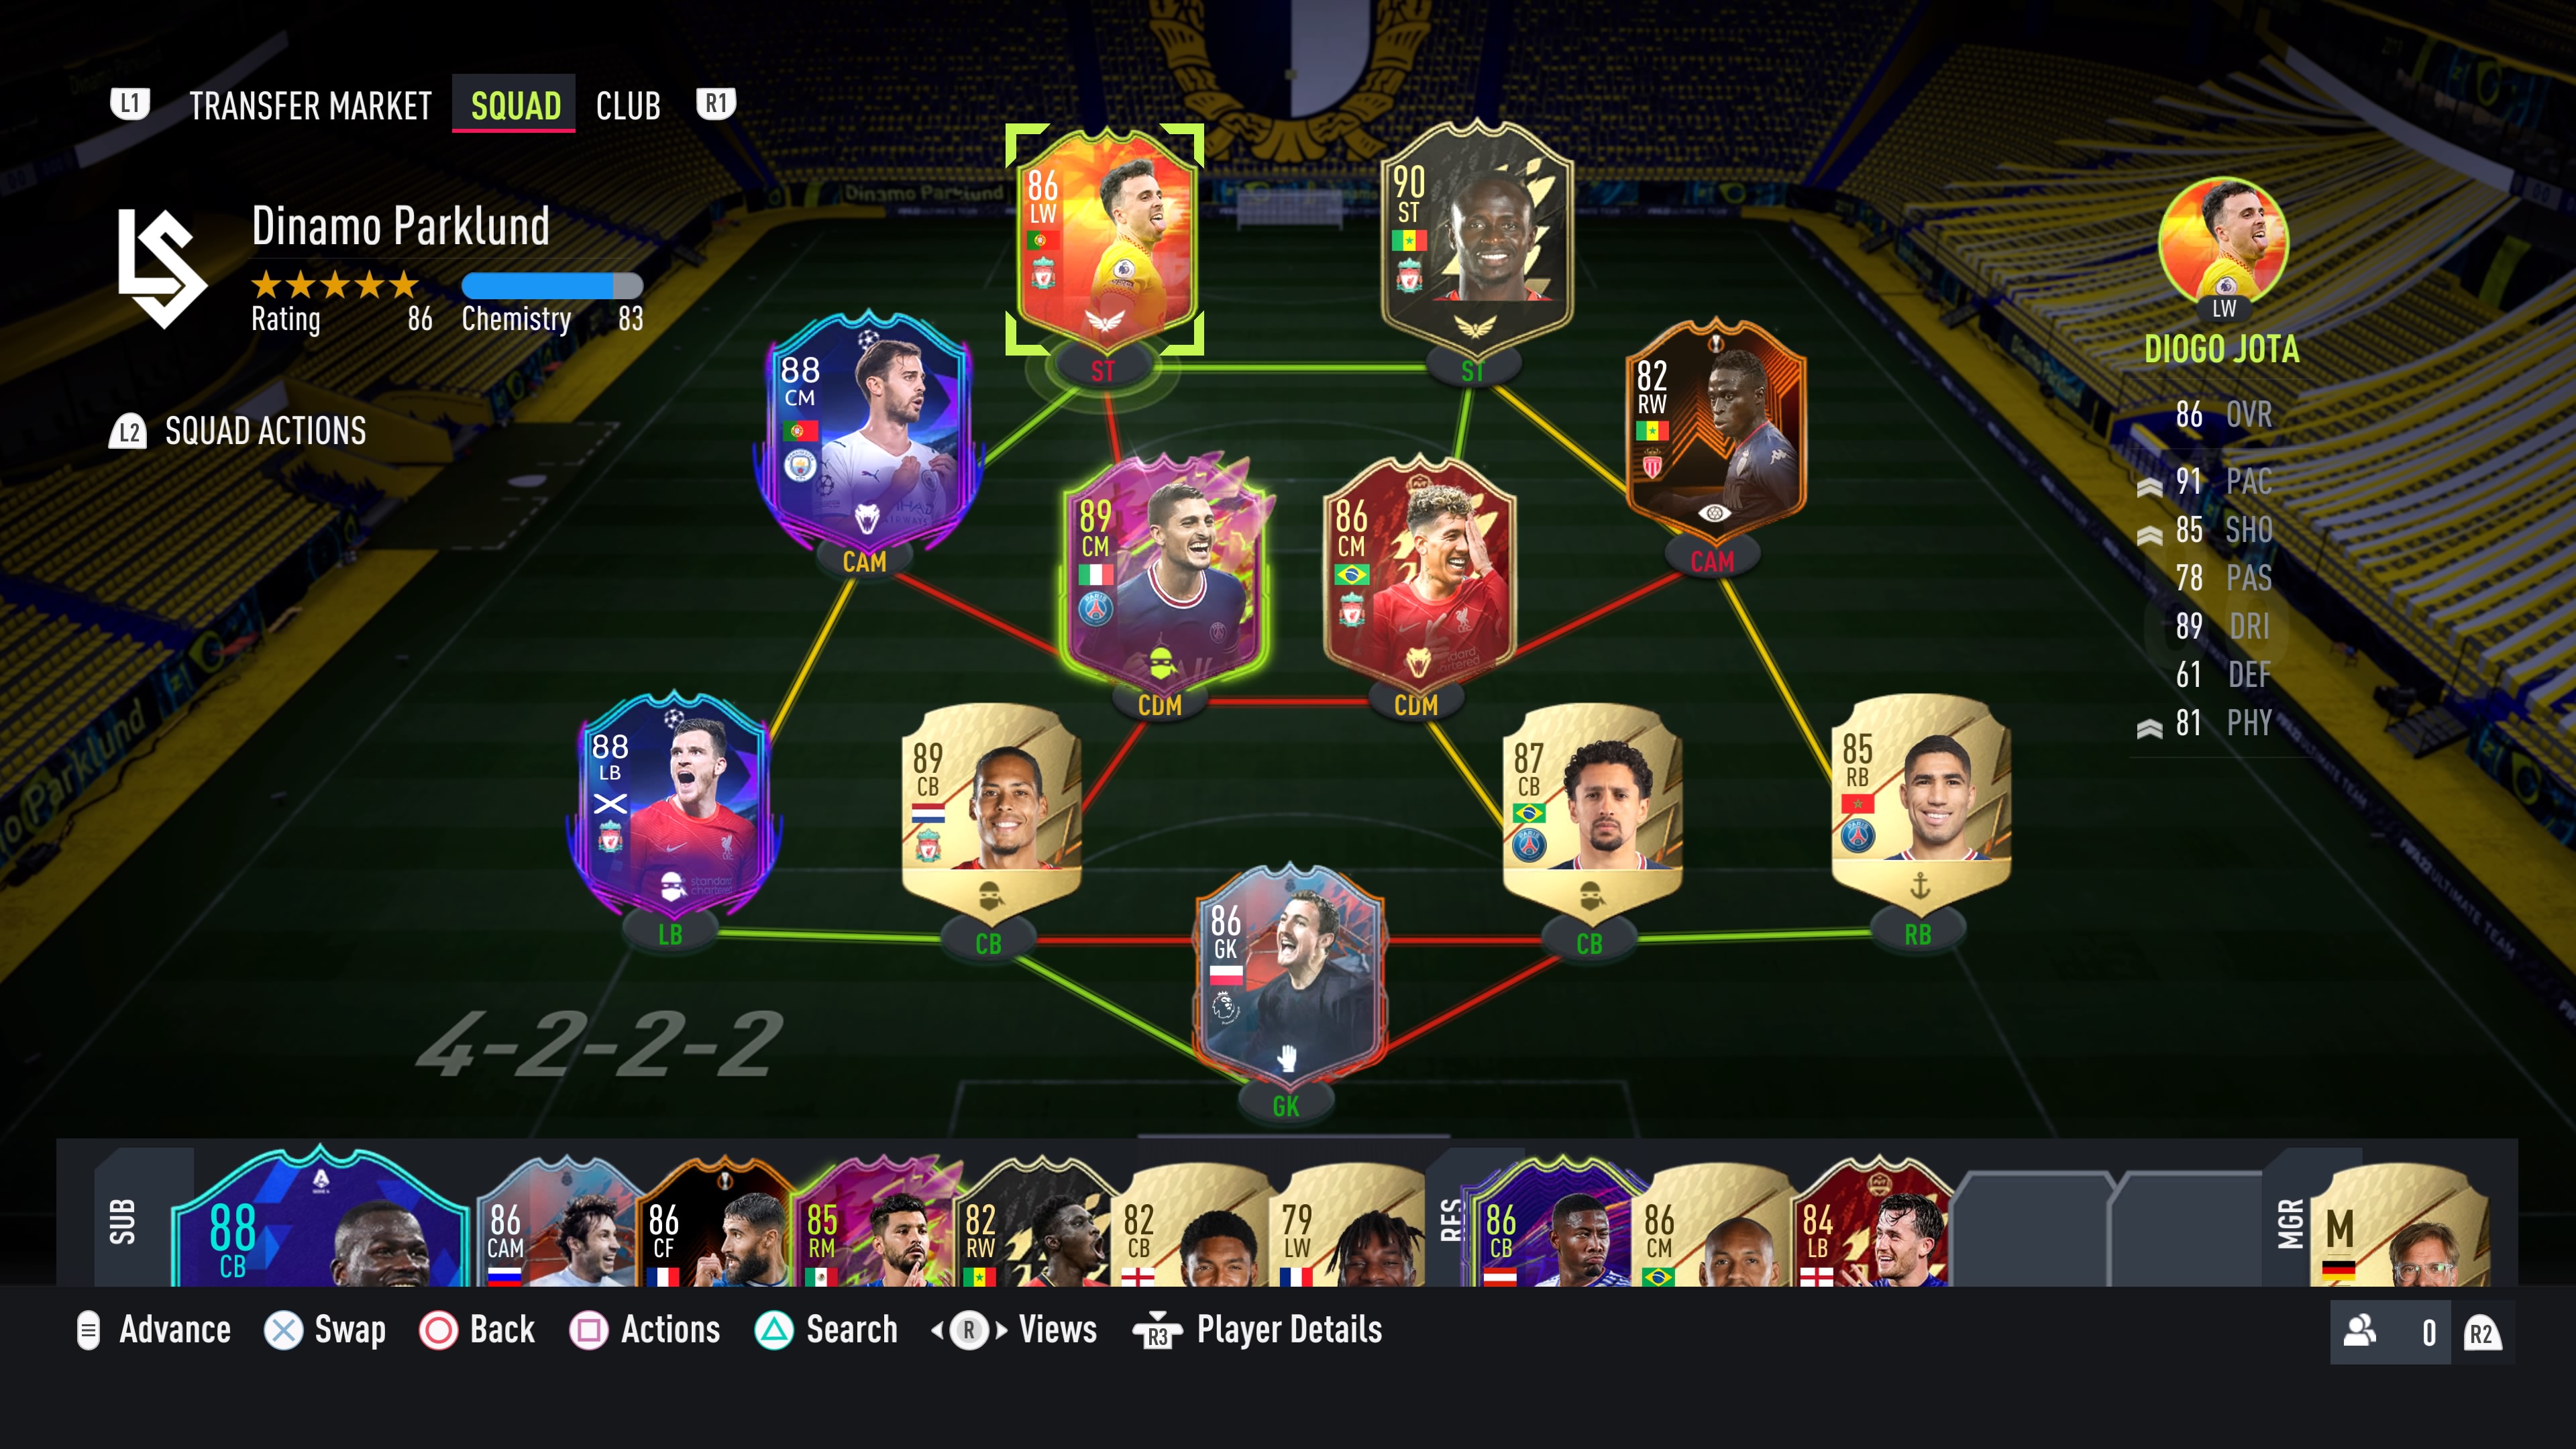
As we start to see the lasting effects of the latest patches I think it is safe to say that we would all like FIFA 22 back in its original form. Yes the keepers were superhuman at close range, yes the keepers turned to mush when the ball was struck from distance, yes certain cards seemed to have out of this world abilities, but … the game was predictable, the game was manageable and most of all, the game was fun. At this stage, it appears that once again the gameplay is slightly moving in the wrong direction and certainly the return of a more drop-back-through-ball meta has emerged in spades. For myself this is always going to cause problems as I refuse to “buy in to win,” but this weekend the return of an old friend in the 4-2-2-2 formation was the spark needed to ignite my offence, secure my defence and a return to Rank I FUT Champs was never the goal… but ended up being the reality.
Why 4-2-2-2?
Balance… Balance… Balance. This formation reigns supreme for me in terms of balance both across and down the length of the pitch. I always feel like I am in control (or as much as you can be) of different situations that arise across a 90 minute match. In attack, the double ST combination is an excellent way to play in between the lines of even the most dropped back opponent. The use of the CAMs and LB/RB in tandem means that an overload down the wing is a potential threat at all times. While I leave the LB/RB on Stay Back instructions, they are just a click of a button away from bombing on down the wings, causing added problems for my opponent. The double CDM is then always ever-present to break up counters before they start and ultimately provide an excellent shield for the back four… while a traditional back four continues to be a favorite of mine in general.
Team
Tactics
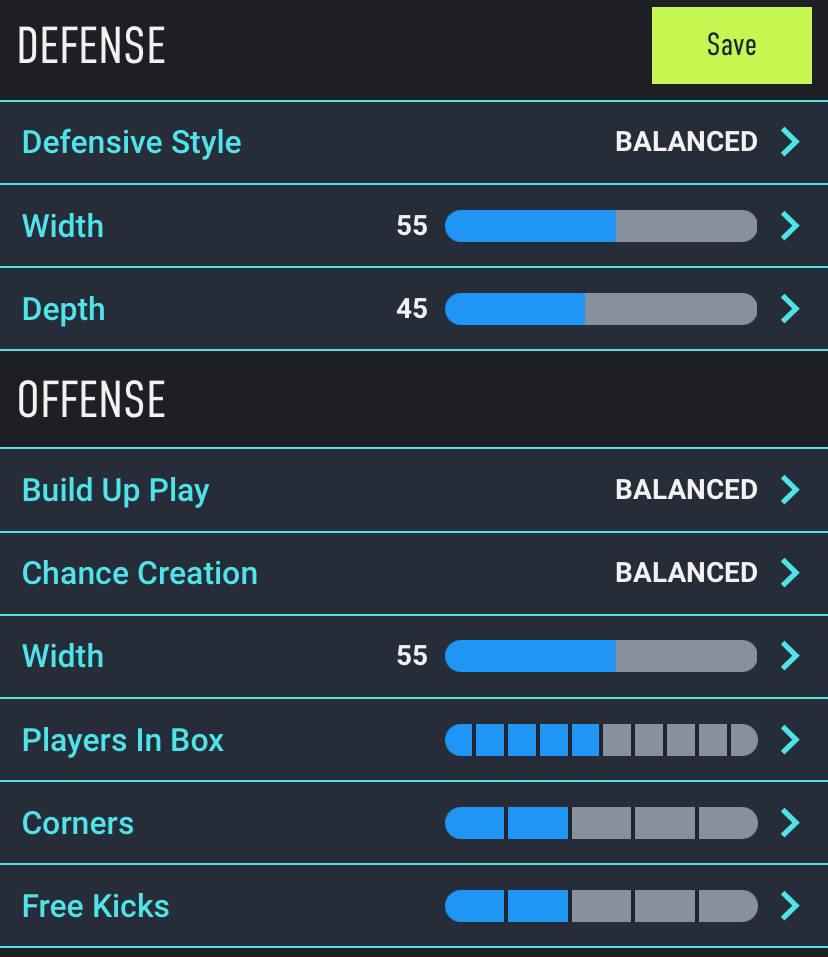
Play Style
If you opt for a more Balanced Build-Up Play and Chance Creation (as I do) then this formation is certainly more of a possession style. The fact that there are overloads in different areas of the pitch means that you simply have to work the ball into those areas and chances will reveal themselves. The focal point is certainly the strikers with the end goal finding them in some space 1v1 or 2v2 at the top of the box and then finding your moments to get efforts towards goal. However, when changing to Fast Build Up Play and Forward Run Chance Creation this formation can become quite the counter attacking force. I used this option often when down in the middle of a match and before I wanted to throw everyone forward. The CAMs become more involved and certainly, the CDMs get pulled forward more, which offers even more options to play quickly through the lines.
Width
Similar to the 4-2-3-1 formation I use a narrower width in hopes that the Get in the Box instructions work even better based on the starting position of the CAMs… providing additional bodies in dangerous areas. From a defensive perspective if you are going to allow space to your opponent it is better on the wing than in the center of the pitch bearing down on your keeper.
Depth
The game simply does not allow for a higher depth than the 45 I have been using along with the Balance Defensive Style. Even then I find that I am most vulnerable to over the top and driven through balls. However, if you are quick to get those CDMs stepping up to stop attacks before they begin it is manageable and offers a lot of counter attack opportunities in your favor. Having quicker wingbacks set to Stay Back While Attacking is also a huge help as they will have the pace to come across and help your CB deal with those over the top chances.
Player Instructions
ST: Clinical/Technician → Bal. Width - Get In Behind - Normal Int. - Bal. Support
ST: Pace Merchant → Bal. Width - Get In Behind - Normal Int. - Stay Forward
LAM: Left Footed, High Stamina → Balanced - Get in Box - Stick Position - Normal Int.
RAM: Right Footed, High Stamina → Balanced - Get in Box - Stick Position - Normal Int.
* Note: Some like opposite footed players to cut in and finesse, I am looking more for quality deliveries and the ability to finish across body/goal.
CDM #1: Magician, Ball Player → Cut Lanes - Bal. Attack - Normal Int. - Cover Center - Stick Pos.
CDM #2: Defensive Specialist → Cut Lanes - Stay Back Attack - Normal Int. - Cover Center - Stick Pos.
LB: Left Footed → Stay Back Attack - Normal Int. - Mixed Attack - Stick Pos.
RB: Right Footed → Stay Back Attack - Normal Int. - Mixed Attack - Stick Pos.
* Note: I have been leaving certain RB/LB on Balanced Attack with Overlapping Runs with amazing results. This only works for some players. Alphonso Davies for instance gets
too far forward with these instructions and I can’t use them. However, RTTK Robertson does brilliantly. Try them for a match and it will be clear if they work well or need to be brought back to Stay Back While Attacking.
CB: → Stay Back Attacking - Normal Int.
GK: Come Crosses - Balanced
Conclusion
I won’t suggest that these tactics will guarantee me Rank I every weekend and certainly I had some luck and various moments go my way this past Weekend League. However, what I will say is that even in the matches I lost I always felt like I had a chance. The 4-2-2-2 plays to the strength of players like myself who rely more on movement, passing and quick turns to create chances, as the numbers always seem to be there. I hope that if you try these tactics that you find the same balance, results, and most importantly the enjoyment that I did this past weekend. Hoping you are well. Cheers for reading.